 Removing the System Board
Dell™ Latitude™ C400 Service Manual
The system board's BIOS chip contains the service tag sequence, which is also visible on a barcode label on the bottom of the computer. The replacement kit for the system board may include a CD that provides a utility for transferring the service tag sequence to the replacement system board.
 |
NOTICE: Disconnect the computer and any attached devices from electrical outlets, and remove any installed batteries. |
|
NOTICE: To avoid ESD, ground yourself by using a wrist grounding strap or by touching an unpainted metal surface on the computer. |
|
NOTICE: Read "Preparing to Work Inside the Computer" before performing the following procedure. |
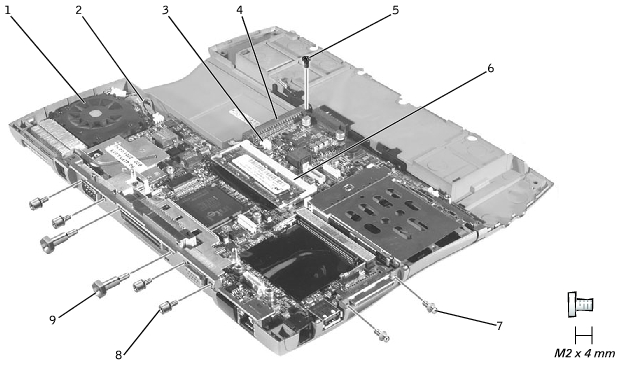
1 | fan |
2 | reserve battery cable |
3 | connector for fan extender cable |
4 | hard-drive connector |
5 | M2 x 4-mm screw (1) |
6 | memory module socket |
7 | guide pins (2) |
8 | 5-mm hex nuts (4) |
9 | 7-mm hex nuts (2) |
While replacing the system board, pull the fan extender cable aside to avoid trapping it beneath the system board. After replacing the system board, route the cable between the hard-drive connector and the internal memory socket.
After you have replaced the system board, insert the floppy disk or CD that accompanied the replacement system board into the appropriate drive, and turn on the computer. Follow the instructions on the screen.
 |
NOTE: After replacing the system board, be sure to enter the computer's service tag sequence into the BIOS of the replacement system board. |