 Removing the Display Assembly
Dell™ Latitude™ C400 Service Manual
 |
NOTICE: You must remove the display assembly before you remove the palm rest. |
 |
NOTICE: Disconnect the computer and any attached devices from electrical outlets, and remove any installed batteries. |
 |
NOTICE: To avoid ESD, ground yourself by using a wrist grounding strap or by touching an unpainted metal surface on the computer. |
 |
NOTICE: Read "Preparing to Work Inside the Computer" before performing the following procedure. |

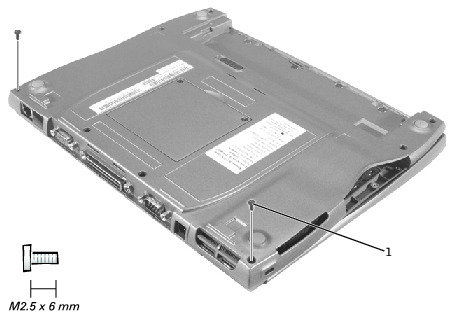
1 | M2.5 x 6-mm screws (2) |

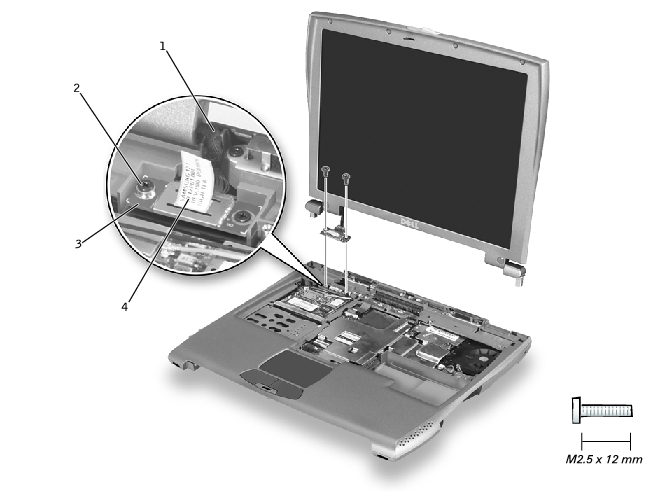
1 | display-feed flex cable |
2 | M2.5 x 12-mm screws (2) |
3 | display-feed flex cable hold-down board |
4 | pull tab |
 |
NOTICE: Disconnect the computer and any attached devices from electrical outlets, and remove any installed batteries. |
 |
NOTICE: To avoid ESD, ground yourself by using a wrist grounding strap or by touching an unpainted metal surface on the computer. |
 |
NOTICE: Read "Preparing to Work Inside the Computer" before performing the following procedure. |
To replace the display latch, you must replace the whole bezel.

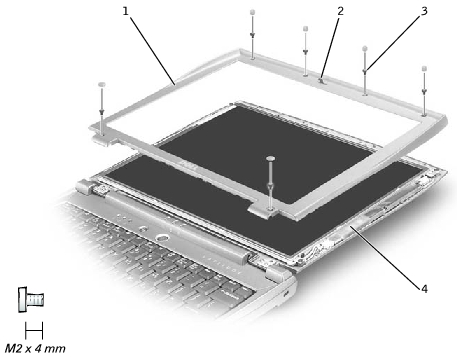
1 | bezel |
2 | display latch |
3 | M2 x 4-mm screw (6) |
4 | display assembly |