 Removing the Audio Board
Dell™ Latitude™ C400 Service Manual
 |
NOTICE: Disconnect the computer and any attached devices from electrical outlets, and remove any installed batteries. |
|
NOTICE: To avoid ESD, ground yourself by using a wrist grounding strap or by touching an unpainted metal surface on the computer. |
|
NOTICE: Read "Preparing to Work Inside the Computer" before performing the following procedure. |
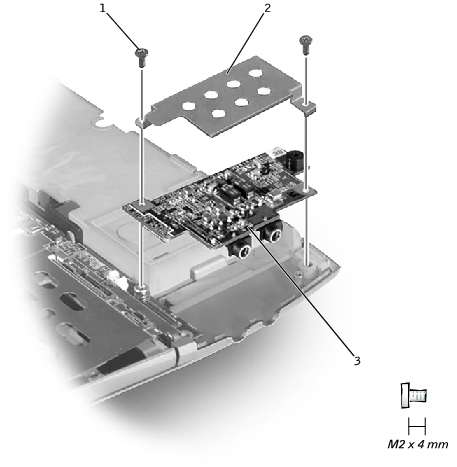
1 | M2 x 4-mm screws (2) |
2 | audio board shield |
3 | audio board |
The audio board can be easily misaligned. When replacing it, first align the two screw holes in the board with the holes in the bosses. Then, as you press the audio board into the connector, sight sideways between the audio board and the system board to ensure that all pins on the audio board connector are headed correctly into the system board connector.