Back to Contents Page

Microprocessor Thermal-Cooling Assembly

Dell™ Latitude™ V710/V740 Service Manual


Removing the Microprocessor Thermal-Cooling Assembly

NOTICE: Disconnect the computer and any attached devices from electrical outlets, and remove any installed batteries.
NOTICE: To avoid ESD, ground yourself by using a wrist grounding strap or by touching an unpainted metal surface on the computer.
NOTICE: Read "Preparing to Work Inside the Computer" before performing the following procedure.
  1. Remove the keyboard.

  2. Remove the EMI Shield.

NOTE: You can remove the microprocessor thermal-cooling assembly with the fan attached.
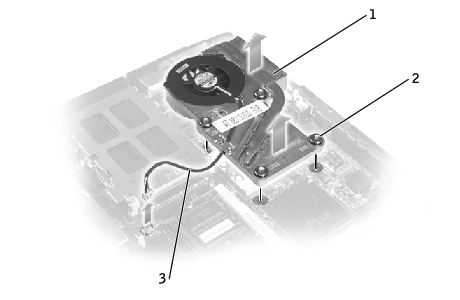
  1. Disconnect the fan power cable from the system board.

  2. Loosen in consecutive order the four captive screws, labeled 1 through 4, that secure the microprocessor thermal-cooling assembly to the system board.

1

microprocessor thermal-cooling assembly

2

captive screws (4)

3

fan power cable

  1. Lift the microprocessor thermal-cooling assembly up toward the front of the computer and out of the system board.

Replacing the Microprocessor Thermal-Cooling Assembly

  1. Place the back of the microprocessor thermal-cooling assembly under the palm rest and lower the assembly onto the system board.

  2. Tighten the four captive screws, labeled 1 through 4, in consecutive order.


Back to Contents Page