Back to Contents Page

Keyboard

Dell™ Latitude™ C840 Service Manual


NOTICE: Disconnect the computer and attached devices from electrical outlets and remove any installed batteries.
NOTICE: To avoid ESD, ground yourself by using a wrist grounding strap or by periodically touching unpainted metal on the computer.
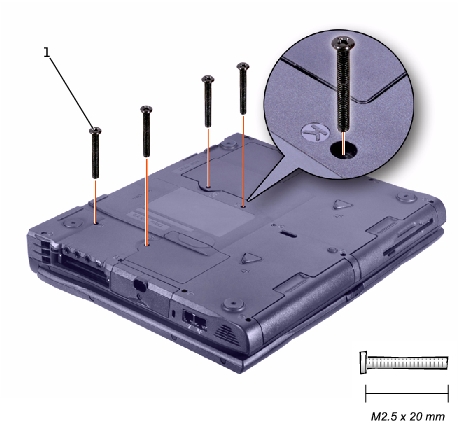
1

M2.5 x 20-mm screws (4)

Removing the Keyboard

  1. Follow the instructions in "Preparing to Work Inside the Computer."

  2. Turn the computer over and remove the four M2.5 x 20-mm screws (three labeled "circle K" and one labeled "circle K/M").

  3. Turn the computer over and open the display.

NOTICE: Be careful when handling the keyboard. The keycaps are fragile, easily dislodged, and time-consuming to replace.
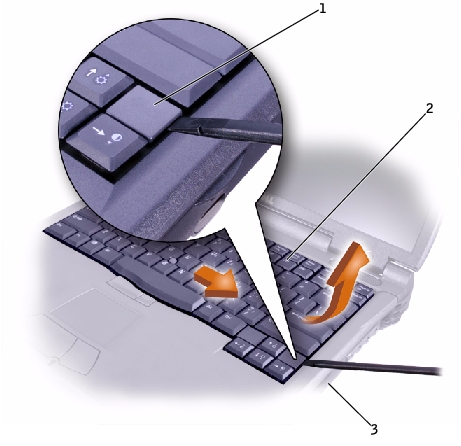
  1. Use a nonmarring plastic scribe under the blank key to pry up the keyboard.

1

blank key

2

keyboard

3

right side of computer
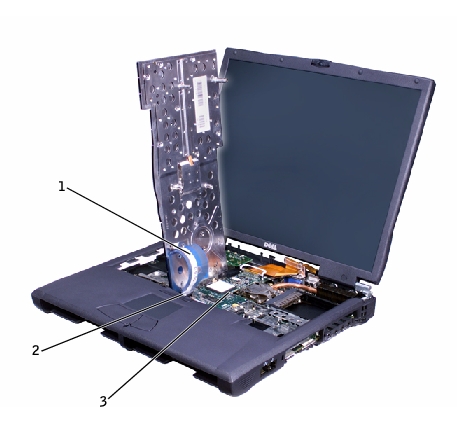
  1. Lift the right end of the keyboard and slide it slightly toward the right side of the computer to disengage the tabs at the left end.

  2. Pivot the keyboard and balance it upright on the left side of the computer.

1

keyboard cable

2

keyboard interface connector

3

system board

  1. Disconnect the keyboard cable and lay the keyboard aside.

Replacing the Keyboard

  1. While bracing the keyboard upright on its left end, connect the keyboard cable to the keyboard interface connector on the system board.

NOTICE: Position the keyboard/track-stick flex cable so that it is not pinched when you replace the keyboard in the bottom case.
  1. Insert the metal tabs at the left end of the keyboard under the edge of the bottom case, and fit the keyboard into place.

  2. Check that the keyboard is correctly installed. The keys should be flush with the left and right surfaces of the palm rest.

  3. Turn the computer over and reinstall the four M2.5 x 20-mm screws. For extra stability, you can open the computer slightly and brace the keyboard under each screw as you install the screw.


Back to Contents Page