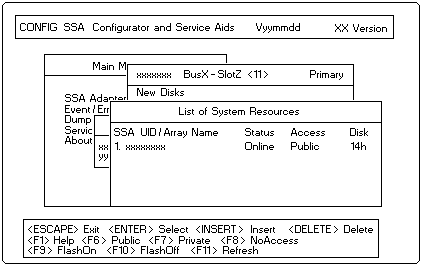
From the menu screen for this adapter, select System Resources.
A list, initially blank, of the resources attached to the system is displayed, the resources are
listed in disk-address order. Only resources that are attached can be accessed by the operating system.

To attach a resource:
- Press Insert.
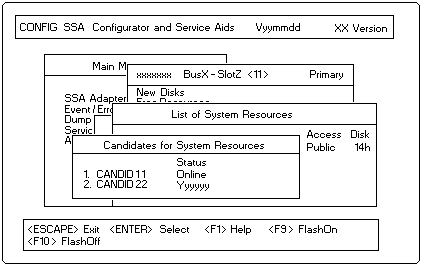
- A list of candidate resources is displayed:

These are the resources that are in the free state.
Select the resource that you want to attach.
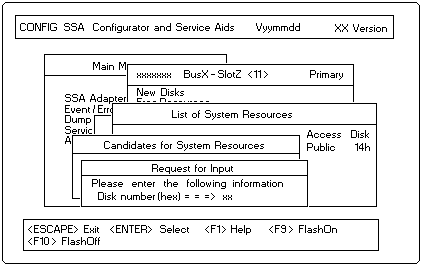
Its name disappears from this list and the Request for Input window opens:

- The disk number automatically assigned for the new resource is shown,
this will be one greater than the highest disk number already assigned.
You can change this by overtyping it.
NOTES:
- If you are going to boot from an SSA disk drive, that disk drive must be at the top of the list
of the first SSA adapter found by the system (that is, the SSA adapter with the highest priority within
the system).
The access mode of the disk drive must be local to the system that you are booting
('Viewing and Changing Disk Drive Access Modes' describes disk drive access modes and how to set them).
For details of the requirements for booting from an SSA disk drive, refer to the README.TXT file on the Windows NT
Device Driver and Utilities diskette.
- At the position in the list that you choose for the new resource, there need not be a gap in the
sequence of disk numbers.
If there is no gap, the resource that already had the disk number you have chosen is allocated a number one
greater than this.
This reallocation of disk numbers continues down the list of resources until either a gap in the numbers, or
the end of the list is reached.
('Disk Numbers' describes disk drive numbers and how they are mapped to logical buses.)
When you have chosen the disk number for the new resource, press Enter.


 for any BUG on this page found - Thank you.