To create a new security action
-
On the Policy Editor dialog box, select the rule for which
you want a new destination workgroup and click Edit Rule. Or, on the Policy
Editor dialog box, click New Rule.
-
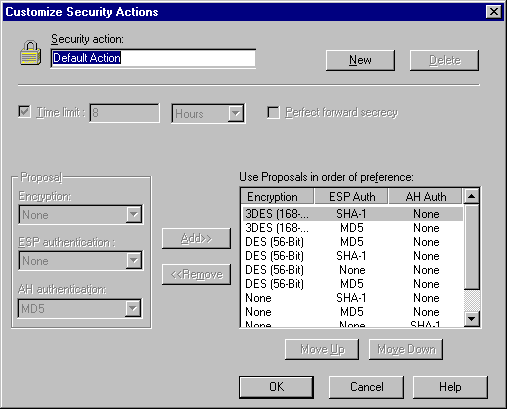
Click Customize Security. The Customize Security Actions
dialog box appears.

-
Click New.
-
In the Security action list box, type a new name for the
security action. Click Intel Packet
Protect Naming Conventions for
rules about naming rules, destination workgroups, and security actions.
-
Specify a time limit for the security association. Refer
to Customizing
Security Actions for detailed information about this and other options
for security actions.
-
If applicable, select the Perfect Forward Secrecy check
box.
-
Add algorithms to the preference list for the security
action:
-
In the Encryption, ESP Authentication, and AH
Authentication list boxes, select which algorithms you want to propose for
the security action. You must select at least one algorithm from any of
the lists.
-
Click Add.
-
Repeat this step for each algorithm combination you want
to add.
If you need to remove an algorithm combination from the
preference list, select the combination from the list on the right, then click
Remove.
-
To indicate your order of preference, move the algorithm
combinations to the correct location on the list by selecting an algorithm
combination and clicking Move Up or Move Down. Move the most important
selection to the top of the list and continue in descending order of
importance.
-
When you are finished, click OK. The new security action
appears in the drop-down list in the Security Action text box on the New
Rule and Edit Rule dialog boxes.
Copyright © 2000, Intel Corporation.
All rights reserved.
Intel Corporation assumes no
responsibility for errors or omissions in this document. Nor does Intel make any
commitment to update the information contained herein.
* Other product and corporate names may be trademarks of other
companies and are used only for explanation and to the owners' benefit, without
intent to infringe.
